Overview
This article helps Enterprise teams integrate BombBomb Engage with Microsoft Entra ID (formerly Azure Active Directory) using SAML 2.0. This connection enables secure Single Sign-On (SSO), strengthens authentication, and centralizes user access management.
Who This Applies To
✅ Plan Type: Enterprise
Step-by-Step Instructions
Create a Custom Enterprise Application
Log into the Microsoft Azure Portal.
Open the Azure Active Directory service.
In the left navigation menu, select Enterprise Applications.
Click + New application.
Click Create your own application.
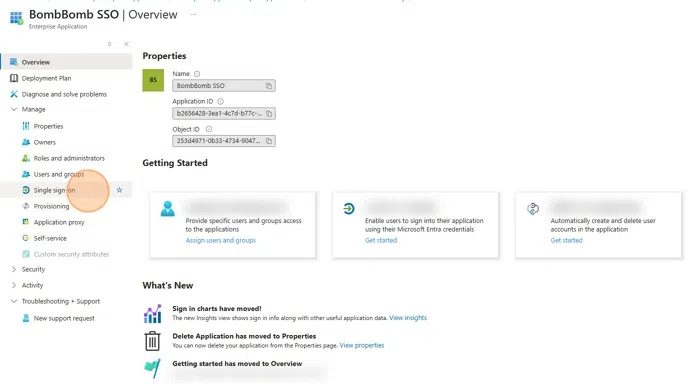
Name the app (e.g., "BombBomb SSO"), select Integrate any other application you don’t find in the gallery (Non-gallery), and click Create.
Ignore any suggestions about existing BombBomb applications.
Proceed to configuration.
Configure Single Sign-On (SAML)
From the app overview page, navigate to Single sign-on in the left menu.
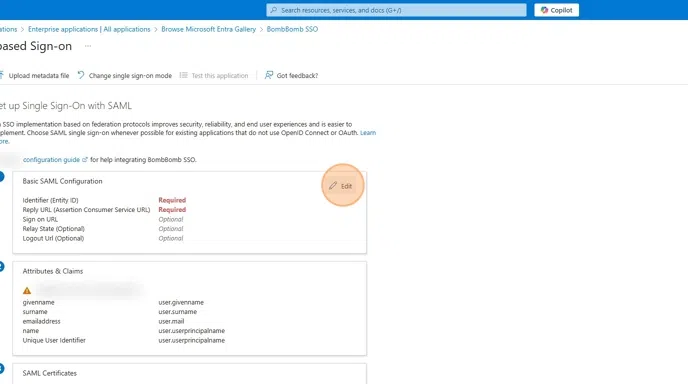
Select SAML as the sign-on method.
Step 1: Edit Basic SAML Configuration
Click the Edit pencil in Step 1: Basic SAML Configuration.
-
Configure the fields as follows:
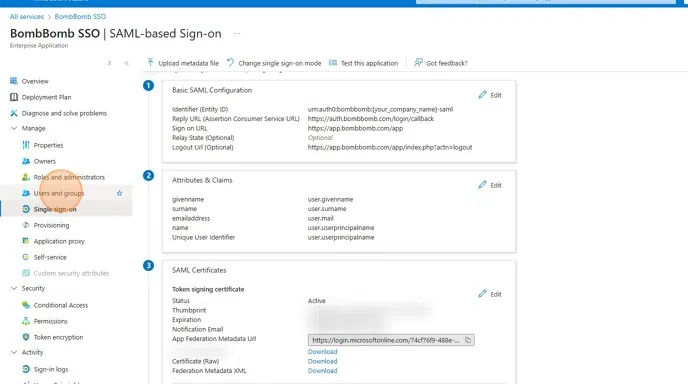
Identifier (Entity ID):
urn:auth0:bombbomb:[your_company_name_in_lowercase]-samlSelect Add Identifier in the Reply URL (Assertion Consumer Service URL) and enter the following value for your setup:
https://auth.bombbomb.com/login/callback?connection=yourcompanynameinlowercase-samlSign-on URL:
https://app.bombbomb.com/appRelay State:
Leave blank.Logout URL:
https://app.bombbomb.com/app/index.php?actn=logout
🗣️ Note: Replace [your_company_name_in_lowercase] with your company’s name formatted in lowercase or a particular acronym or nickname for your company you want to use as an identifier.
Step 2: Confirm Attributes & Claims
- Verify the following mappings under Attributes & Claims:
| Claim Name | Value |
|---|---|
| givenname | user.givenname |
| surname | user.surname |
| emailaddress | user.mail |
| name | user.userprincipalname |
| Unique User Identifier | user.userprincipalname |

Step 3. Send Information to BombBomb
After completing configuration:
Download the Certificate (Base64) file.
-
Send an email to your BombBomb representative containing:
The downloaded Certificate
- The email address you would like to be updated at with any SSO updates or changes (Certificates usually need to be updated every year, so we would like to know who to contact for that update)
The Login URL
The Logout URL
The identifier URL used in the Reply URL section
(https://auth.bombbomb.com/login/callback?connection=yourcompanynameinlowercase-saml)The Entity ID you configured
(urn:auth0:bombbomb:[your_company_name_in_lowercase]-saml)A list of email domains that should redirect to your login page (e.g.,
@example.com,@example.org).
Include in the email all of the above items and you can expect a turnaround of seven days from when we confirm receiving the information.
🗣️ Note: Domain specification prevents users from bypassing SSO login using third-party providers.

Step 4. Verify Users Have Been Added
-
Confirm that assigned users are present in both:
BombBomb Engage
Azure Active Directory > Enterprise Applications > [your_application_name] > Users and Groups
🗣️ Note: Users must exist in both BombBomb and Azure AD to authenticate successfully.
FAQs / Common Issues
Q: Can I use the old BombBomb application template listed in Azure?
A: No. Always create a new custom application. The old template is no longer supported.
Q: What if users aren't redirected correctly to the login page?
A: Ensure you provided the correct list of email domains to BombBomb Support.
Q: Do users have to be assigned in Azure?
A: Yes. Assign users or groups to the BombBomb SSO app manually.